Home Decor How-To: Gallery Wall

Hey Cats!

Happy Monday! I hope everyone had a good weekend! On Saturday, I volunteered with the Junior League and then cleaned my apartment, which was much needed, and on Sunday, I went to the Mumford and Sons concert with my friends Ashley & Biz. It was great! I’m not so sure I’m ready for this busy week ahead, but it’s here whether I want it to be or not.

As I’ve mentioned before, one of the things I was most excited about when moving into my own apartment was decorating it. I actually had most of it planned out before I even chose my apartment, my living room gallery wall included. Since then, I have added another in my bedroom above my dresser, and I am obsessed.

IMG_0589

This wall in my living room is a combination of literally every single piece of art I had hanging in my house in college, plus one or two more. I actually painted the cat, the bird, and the Gatsby quote myself!

IMG_0514

My newest gallery wall is above my dresser in my bedroom. I’ve had the prints since Christmas, but I was waiting for the perfect addition (the rhino) before hanging everything!

Before I created the gallery above my couch, I was under the impression that it was a difficult process and you basically had to be an interior decorator for it to look halfway decent. However, I was pleasantly surprised at how easy it is! So today, I’m sharing with you my tips on how to make the perfect gallery wall:

  1. There are no rules. Seriously. It’s like abstract art, so you can basically do whatever you want, and as long as nothing is crooked, it will probably look good. So keep that in mind.
  2. A mixture of size and shape can add interest, but a few pieces of similar size and shape can give some balance. On my living room wall, nothing is the same size, but most pieces are a horizontal rectangle. The straight lines draw the eye up and down from one piece to the next. In my bedroom I have some unique shapes, but the four prints of equal size and shape anchor the collage.
  3. Try to have a general color scheme or theme. For my living room wall, I drew inspiration from the two colorful paintings with the cat and the bird. They gave me lots of options, and while nothing “matches”, they don’t just look like a hodge-podge. In my living room, I went with a more concentrated color scheme of pink, gold, white, and gray.
  4. Play around with layouts before getting hammer happy. A simple way to do this is to just lay everything out on the floor! That way you can be sure you like how it looks before it’s on the wall and get the spacing correct. Once it’s how you want it, snap a picture with your phone for reference. I hung my bedroom wall by myself, and I left each item in the layout on the floor and hung them one-by-one so I could have a good idea of the spacing as I hung everything.
  5. Leave room to grow! As you can see on both of my walls, there is room to expand, but it doesn’t look incomplete. You never know when you may find the perfect addition, and you don’t want to have to take it all down and start from scratch.
  6. Have fun with it! I mean seriously, I have a marble rhinoceros head, a painting of a cat, a painting of a bird, and a glitter quote about partying on my wall. But neither one of those things looks too bizarre because they’re surrounded by normal things. Remember, “in the Southern home, there’s room to display all manner of elegance & eccentricity”. So there: do what you want.

If you have a gallery wall of your own, I would love to see it! I’m always looking for inspiration (even though I’m running out of walls).

That’s all for meow!

For more Sweet Cats!, follow along at:

Bloglovin’
Twitter
Facebook
Pinterest
Instagram

Last-Minute Costumes: Pineapple and Strawberry

Hey Cats!

I have always loved dressing up, whether its for Halloween, spirit days, date parties, or you know, Wednesday. However, I always wait until the last minute to get my costume together, and there have been a couple of times where I just ended up wearing cat ears. As per usual, I waited until the week of Halloween to decide on my costume, but this time I actually made something! My bestie and I decided to be a pineapple and a strawberry. I found the idea while scrolling through Instagram, and it was so cute and looked so simple to make.

IMG_1019

Also: my face. I usually cut my face out when I take mirror selfies, but obviously I had to get the bow in. It makes me feel awkward to take selfies of my actual face, so this is what I have to offer you. Bye.

IMG_1020

Here’s what you’ll need:

Pineapple:

-1 oversized yellow t-shirt

-black puffy paint

-green bow

Strawberry:

-1 oversized red t-shirt

-white puffy paint

-green bow

Here’s what you do:

First, be sure to put a piece of newspaper inside your t-shirt. This will keep the paint from bleeding through and causing the shirt to stick together!

For the pineapple, simply draw rows of inverted V’s across the entire shirt and the sleeves, like the picture!

For the strawberry, simply draw teardrops haphazardly. You can fill them in if you’d like, but it looks just as good if you don’t!

Also, I was going to make a headpiece of some sort out of green construction paper, but then I found these green spirit bows at HobLob, and as every retired cheerleader knows, DO NOT EVER pass up the opportunity to wear a spirit bow. You will regret it.

These shirts took me maybe 5 minutes each to paint, and cost less than $5 for the entire costume. Pair the tees with black leggings and riding boots and you’re ready to go! This is a great idea for Halloween, date parties, big-little reveal, or any other occasion where you need a cheap but creative costume.

I hope everyone has a fun and safe Halloween!

That’s all for meow!

For more Sweet Cats!, follow along at:

Bloglovin’
Twitter
Facebook
Pinterest
Instagram

DIY-Collage Frame Update

Hey Cats!

About .03 seconds after I signed my lease for my big-girl apartment, I started to think about how I was going to decorate each room. Mostly, I was considering how I would re-use what I already had, partly because I liked it all, but mostly because I didn’t have enough money to completely re-furnish an entire apartment. I was able to use most of my furniture as it was and then (have my dad) re-paint the rest of it, so all I had to buy was a couch! I also had a lot of art to hang on my walls that I had collected over the years, and it all fit pretty well into my color scheme. However, I had this collage frame that I bought for my dorm that I had glued buttons onto to “customize” it when I was in my hot glue phase (everyone has one). As a matter of fact, that was one of my first blog posts on Sweet Cats! (please read it, I love it). As wonderful as that was for my college room, I had definitely outgrown the buttons. So I peeled them off and spray painted it! Which, by the way, was not an easy task. Getting the buttons off, I mean. I had to use a butter knife, a flathead screw driver, and finally my dad’s pocket knife. Crafting can be dangerous.

I would make this a tutorial, but I presume you all know how to spray paint, so I’ll just show you how it turned out!

IMG_0547


1. Sorry for the glare and 2. If you’re my friend and pictured in this collection of best moments from senior year, I hope it’s okay I posted you without consent. Just a few coats of gold spray paint and this frame was taken from girlish to glamorous! Also, I need to address the giant blemish near the top. One button didn’t really want to come off, and so it left a tiny hole. It’s just the angle in this photo that makes it so obvious, but when you look at it in real life it’s not as visible! I’m so glad I got to re-use this frame, because it has so many spaces for photos of my friends, which is something I love to have in my house. I also think it’s cool that I’ve been able to use it throughout college and now after! This just goes to show that if you’re on a tight decorating budget, tweaking the things you already have can make a big difference!

That’s all for meow!

For more Sweet Cats!, follow along at:

Bloglovin’
Twitter
Facebook
Pinterest
Instagram

TJMaxx Tweak- Lilly Pulitzer Maxi

Hey Cats!

For some reason, I am exhausted this week! I’m not sure if it’s because I had a busy weekend, if my regular 6-hour sleep schedule isn’t going to cut it any more, or if it’s because I haven’t been going to the gym regularly anymore. But I should probably start going to the gym again, for a variety of reasons. I’ve been wanting to join a gym, but I can’t find one with an indoor track, and I’m just going to have to convince myself to start running on the treadmill, which could take some time. The treadmill is just so boring, though. I feel like you run forever, but you never get anywhere!  The rec center at school kind of became my second home, and I’m going to have a hard time finding a place that I love as much as I did. Nevertheless, I need to go somewhere, so I’m just going to have to suck it up and start paying for a membership. Ugh. But I digress.

For the longest time, I knew that I wanted to get a Lilly Pulitzer shift dress for graduation. I wanted something classic, Southern, and grown-up, and a Lilly shift had all of those qualities. In November when I started looking, I had my heart set on the Janice shift dress in Shorely Blue.

janice-shift

It was perfect, and I was so excited about it. But, it was definitely expensive, and I wasn’t doing a great job at saving my money. Around spring break, I realized that I probably wasn’t going to be able to afford it. While I was at home for spring break, I went shopping with my mom and sister for Easter dresses, and though I wasn’t happy about it, I started looking for graduation dresses, too. I couldn’t find anything I loved (for graduation…I found about 5 I wanted for Easter…I had two different looks I was going for, okay?) at the first few places we went, and I wasn’t sure what I was going to do. The next day, my mom and I went to TJMaxx to look for a new top to go under my suit, and I thought I would browse the dress section while I was there, just in case.

AND THAT’S WHEN I FOUND IT. I saw the recognizable, bright-colored, juice-stand print peeking out of the rack, and I literally ran to it. They had my size, but there was one problem…it was a maxi dress. My mom was like “I don’t think this is going to work,” but I dragged her into the dressing room anyways-you can’t get what you want if you don’t even try.

I tried it on, and just as I expected it was WAY too long for me. But it fit perfectly everywhere else, and it was beyond gorgeous. I loved it, my mom loved it, and I had to have it. I twirled around in it for a while, and then I had an epiphany. “What if I cut it off and make it a shift dress?”, I asked my mom. She thought it was a wonderful idea, and we spent the next fifteen minutes in the dressing room deciding where we could cut it off, if the alteration place could actually do it, what to do with all the extra fabric, and of course, what shoes I was going to wear. It was the best thing that ever happened to me. Not really, but graduation has come and gone and I’m still just really excited about it.

Here’s what the dress looked like when I bought it:

IMG_0430

Please disregard the HUGE MESS that is my closet at my parent’s house. I was going to take a better picture of it, but I forgot until I was at the alteration shop and the lady held her scissors up to it and said “there’s no going back now!”. So this is the best I’ve got. Anyways, don’t you love it? I will admit that it made me a little sad to cut off all that extra fabric, especially since it had that beautiful lace trim on it. But my mom and I salvaged the fabric and I’m thinking about making a skirt out of it! Also, since this was at TJMaxx, I’m pretty sure it’s out of season. I don’t recognize this print, but I still really love it!

And here’s what it looked like after alterations:

IMG_0431


I’m obsessed. Still. I will seriously wear this thing as long as it fits, because we all know that Lilly is timeless. I was so happy to find it, especially since my dreams of a Lilly dress were crushed by my financial irresponsibility. Speaking of, you’re probably wondering how much I paid to make my graduation dreams come true. The dress itself was $80, and alterations were $20, so $100 total. Still not cheap, but significantly less than buying my first choice! I’ve never been one to tweak clothes to my liking, because most of the time, alterations are kind of a hassle, and it seems easier to me to just find something else that fits how I want it to. But do you remember Monday’s talk about not settling? Yeah, this was about the time in my life that I decided not to settle for anything I didn’t really want, and I decided that yes, that even applied to my clothes. Also, I really like the idea that probably no one else has this exact dress. I’m definitely going to start searching for more bargain pieces that I can tweak to my tastes. This is a great way for those of us who are extremely picky to customize our wardrobes without spending a fortune!

That’s all for meow!

For more Sweet Cats!, follow along at:

Bloglovin’
Twitter
Facebook
Pinterest
Instagram

DIY- Monogrammed Mortarboard

Hey Cats!

It’s Wednesday! I hope y’all are having a wonderful week, and if not, Friday is in 48 hours, so keep thinking about that. Houston has decided to finally be sunny, which I have been loving after all of these scary floods. Luckily, most of the roads where I live weren’t affected and I was still able to get to work (and Chipotle, thank God), but I know there was a lot of flooding and damage near downtown Houston. But at last the sun is shining, it’s actually worth my time to fix my hair, and it’s finally starting to feel like summer!

As you all know, I recently graduated from college. One thing I had been looking forward to about graduation (for a few years, actually) was decorating the mortarboard. I also knew for quite some time that I wanted to put my monogram on it, because as you all also know, if I can monogram it- I will. On your mortarboard, it’s classic, personal, and even if there are 50 other girls with monogrammed caps, your family can (maybe) still tell which robed figure you are. In the words of my friend Ashley, “either monogram it or leave it blank”. Couldn’t have said it better myself.

However, I personally don’t have the best penmanship (I like to describe my handwriting as comparable to that of an 8th grade boy), so I knew that I wasn’t going to be able to do this myself. Ashley had hers embroidered, which I really, REALLY loved and planned to do for probably a year. But, guess who forgot to order her cap and gown until Spring Break (Sometimes I’m not really sure how I made it through college), and wasn’t able to pick it up until three days before graduation? So embroidery was obviously out of the question, and I was forced to get creative.

While scrolling through my Instagram feed, I caught a glimpse of a car decal on Marley Lilly’s account, and I had an epiphany. Buy the decal and stick it on my hat. Minimal effort, maximum effect. However, I was a little concerned as to whether or not the decal would stick to the fabric on my mortarboard. After all, you only get one hat, and I didn’t want to mess it up. So I emailed support at Marley Lilly, asking whether or not they had ever received feedback on using a car decal on a graduation cap. The girl that responded was very nice, and she even gave me a few tips!

IMG_0393

I chose the 5 Inch Decal in pink glitter, because go big or go home, obviously. I chose to place it in the back corner, because the button was in the way, and luckily, it fit right in the center of the “M”. It was pretty easy to apply, but I did accidentally rip it, as you can see in the left corner of the “L”. But, it wasn’t too noticeable, and I was still really happy with it! It matched my dress, and my family said they could definitely find me in the crowd… but that could have been because I was struggling to keep the stupid thing on my head as I walked in Note: if you’re graduating soon, please bring bobby pins, no matter how big you think your head is. Because though they claim to be one size fits all, they sure are not. I digress. But seriously, if you’re looking for a quick and inexpensive way to add a personalized touch to your big day, a decal is the way to go. Marley Lilly has a variety of sizes, fonts, and colors, so you can coordinate to your dress, show some school spirit one last time, or just pick your favorite color! Whatever you decide, just remember that if you don’t monogram it, just leave it blank.

That’s all for meow!

For more Sweet Cats!, follow along at:

Bloglovin’
Twitter
Facebook
Pinterest
Instagram

Wednesday Pins-Day

Hey Cats!

Happy Wednesday! I’m so excited for today, because this is the last day of finals, which means my roommates will be done with tests, and I won’t be by myself all day. It’s been nice to relax and not have any responsibilities for the past couple of days, but I’m ready to do fun summer activities with my friends! Since I’ve had all this free time, I’ve been doing plenty of pinning, and I’ve come across a few things I’d like to share with you all!

mirrored pots

First are these cute mirrored plant-holders. (Is that what they should be called? Help.) I love the modern look the mirrors give the plants, and it would work well in a variety of home decor styles. The website isn’t in English, but the photo itself is fairly self-explanatory. Just 5 square mirrors and some hot glue and you’ve got yourself a nice little craft. If I had a green thumb I would be more eager to go for this project, but I typically kill all things green within two weeks, so I might have to adapt this to work with something other than plants.

keyhole earrings

Next are these Keyhole Earrings from sonya renee. My roommate has a similar pair, and I’m mildly obsessed with them. They’re a perfect dainty touch to any outfit, and the classic shape ensures that they will be a staple in your jewelry collection for years to come. These are definitely on my purchase list for this summer!

brussel sprouts

Next is this delicious recipe for roasted brussels sprouts from Cakes Cottage. Brussels sprouts are my new favorite vegetable, and I make them multiple times a week, not a joke. I’ve sauteed them before and enjoyed them, but I think roasting is my favorite. I love how they get really crispy- SO GOOD. Instead of the garlic aioli sauce in this recipe, I typically dip them in a little Greek yogurt mixed with a splash of lime juice and a sprinkle of dill, and it’s everything. If you’re looking for a new side dish, give this one a try- you’ll love it!

george

Finally, I have this adorably hilarious meme of Prince George sassing it up on the Australian tour. I’m so sad that’s over, because between Kate’s ensembles and George’s shenanigans I was incredibly entertained.

That’s all for meow!

For more Sweet Cats!, follow along at:

Bloglovin’
Twitter
Facebook
Pinterest

DIY-Arm Knitted Infinity Scarf

Hey Cats!

Happy Thursday! I hope everyone has had a great week! I wanted to share a project I completed over Spring Break- my arm-knitted infinity scarf! As you may or may not know, I enjoy other needle crafts such as knitting and crocheting (wow, that sentence makes me sound like I’m 80- I’m a normal 21-year old, promise!), and I’ve been very intrigued by arm-knitting.

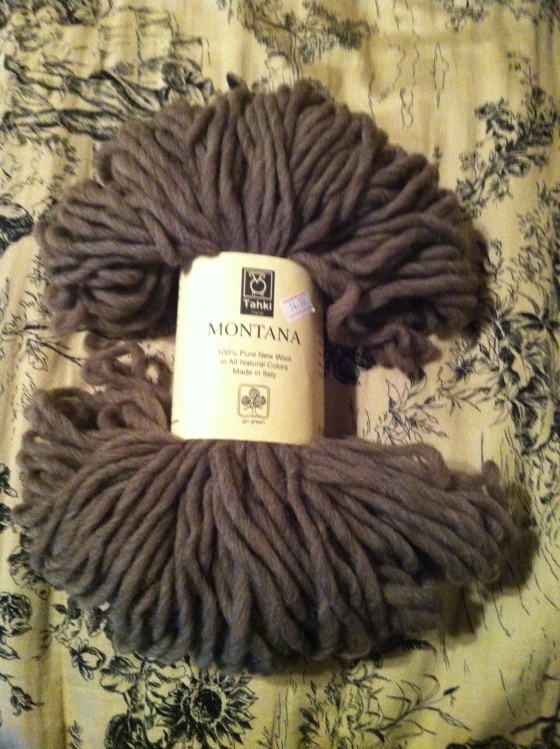
Over Spring Break, my parents and I went to Hot Springs, Arkansas, and wandered into a cute little knitting shop downtown. I personally love “yarn boutiques”, because they are so cozy, have a unique selection of yarn, and there’s always a sweet lady who loves to talk about knitting. This one, of course, had all of those things, and while I loved the selection of fibers, I was enamored by the first project the sales lady showed me- the arm-knitted infinity scarf. She said you could just find a video on YouTube, and complete the project in 30 minutes to an hour- Sold! I chose a medium-brown natural wool and went on my merry way.

I found a link to a video on Pinterest, and completed the scarf as soon as I got home! However, it took me a couple of hours, only because I got my yarn tangled into a giant mess.

Arm-knitting is incredibly simple, you don’t need any knitting experience- just your arms!

Here’s what you’ll need:

photo (63)

-1 large skein of very chunky yarn. I used this 100% wool, but you could use anything you’d like

-Two arms

-One hour

Here’s what you do:

I found these great instructions-complete with a video from Simply Maggie on Pinterest. There are also PDF instructions you can download, if that’s what you prefer. I feel like I’m cheating sending y’all to a video, but I’m sure Maggie explains it much better than I could!

I simply followed her instructions, casting on 12 stitches and knitting until I was almost out of yarn. Then, instead of using a needle to sew the ends together, I used my fingers to weave the ends together, making sure not to pull too tight.

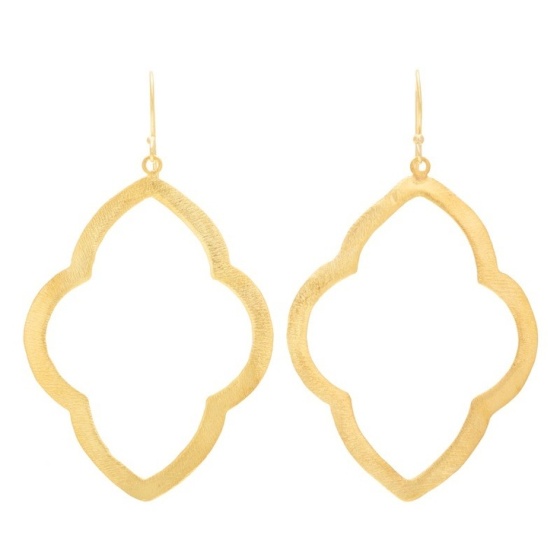
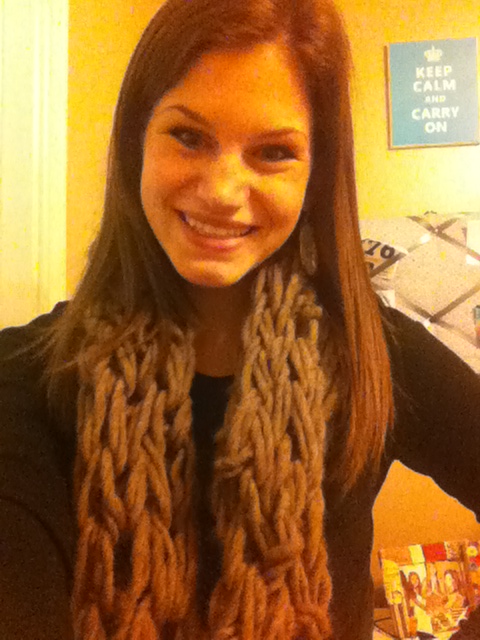
Here’s what mine looks like: (Also, I apologize for the selfies/weird yellow lighting. My roommates were sleeping so I had to improvise.) You can’t really see them, but I’m wearing my fave Kendra Scott Danielle Earrings in Ivory Pearl– a great, neutral compliment to this scarf!
image (63)


image (64)

A few tips:

-Even if your yarn is chunky, hold two strands together. I did, and mine still has fairly large holes!

-Untangle your yarn BEFORE you begin- this will save you lots of stress.

I am OBSESSED with this scarf. The color is a great neutral, it’s warm and fuzzy, and of course, since it’s an infinity scarf I can just throw it on and run out the door! My only complaint is that I waited until it was warm outside to make it!

I hope everyone has an excellent Thursday- the weekend is ALMOST here!

That’s all for meow!

For more Sweet Cats!, follow along at:

Bloglovin’
Twitter
Facebook
Pinterest

Wednesday Pins-Day

Hey Cats!

I hope everyone is having a great week! I had a test and a paper due yesterday, so I’m relieved to have those out of the way. As usual, I’ve been pinning, and I found a few things I need to share with you all- enjoy!

Also, don’t forget to follow me on Pinterest for more great ideas!

Kate Spade pillow

First are instructions to make this bow pillow as seen in the Kate Spade store from The College Prepster. Isn’t this the cutest? I think I may have to make a few to spruce up my room!

Strata Stripe Dress

Next is this V-Neck Tunic Dress from Kate Spade Saturday in one of their new summer prints, Strata Stripe. I’m absolutely obsessed with this print, and I’ve already got my eye on quite a few pieces that would be perfect for spring and summer!

parm ranch chicken

This Ranch Parmesan chicken recipe from KitchMe is just delicious. I made it for dinner last week, and it’s a new favorite for sure. The ranch dressing adds so much more flavor than dipping the chicken in an egg mixture, which I loved. You should definitely try it some time this week!

cheese


Last is this, because it’s hilarious and completely true. Cheese is a food group of its own in my opinion.

What have you been pinning lately?

That’s all for meow!

For more Sweet Cats!, follow along at:

Bloglovin’
Twitter
Facebook
Pinterest

Recipe-Chocolate M&M Crinkles

Hey Cats!

I hope you are all having a fantastic week so far! I moved into my new place on Sunday, and one of my roomies is FINALLY coming this afternoon! I’m excited to see her! It’s been a little lonely! Also, we just got the internet and cable installed in our townhome about ten minutes ago, but we don’t have a router yet, so I’m currently sitting in the closet under the stairs, connected to the modem with and ethernet cable. It’s a little awkward.

Anyways, today I’m going to share with you a spinoff of the easiest cookies you will ever make, Princess Pink cake mix cookies. I’ve mentioned that there are millions of ways to make cake mix cookies, and here’s another! These are quite delicious, especially if you love chocolate!

Here’s what you’ll need:

photo (43)

-1 chocolate cake mix

-1 cup mini M&M’s

-2 eggs

-1/2 cup vegetable oil


Here’s what you do:

First, mix together in a large bowl the cake mix, oil, and eggs until completely combined. The dough will be quite oily!

Next, mix in the M&M’s until evenly distributed.

Roll into even balls and place 2 inches apart on a greased cookie sheet.

Bake at 350 for 12-14 minutes, or until cookies are firm to the touch.

image (50)

Enjoy!

How easy are these? I love the mini M&M’s, they just take over the batter and you have a little extra chocolate in every bite! You could also try this with other cake mix/add-in combos! I’m thinking maybe strawberry with chocolate chips, yellow cake with heath bits… the possibilities are endless!

That’s all for meow!

DIY-Summer Shorts

Hey Cats!

As I mentioned last week, “re-purposing shorts” has been on my to-do list for two summers now. I bought all the supplies last year, but I never quite got around to making them. This summer, I was determined to finish (and start) the project. Before we go any further, let me be frank. This isn’t really going to be a detailed tutorial on how to embellish your denim shorts. I forgot to take too many crucial photographs along the way, and honestly, my mom did most of the sewing for me. Sewing isn’t really my thing. I wish it was, but I just can’t do it and I don’t really know why. This post serves as inspirational rather than instructional. That being said, you may be able to pick up a few tips along the way!

First, gather your supplies. You will need an old pair of jeans, (or capris, or shorts!) fabric, and embellishments of your choice. I chose these capri pants I’ve had since maybe about the eighth grade. A good tip from my friend China (we’ve been friends since before the eighth grade) is to get your jeans (if you’re buying them from a thrift store) a size larger so they will fit like shorts in the legs, instead of tight like jeans! I also chose a tribal-print fabric for an extra summery vibe, silver studs, and giant gold rick-rack that I ended up not using.

photo (42)

Next, cut a considerable amount off of your pants. Cut them longer than you think you’ll want them, because you can always cut off more, but you can’t add it back! This is also the time to decide whether or not you want to hem or cuff the edges, or leave them to fray, because this will have an effect on the length. I cut one side, then folded it over to cut the other side, to make sure they were even.

image (45)

Next, cut your fabric to fit where you’re going to place it. I chose to do a panel of fabric on the front right side, and on the back left pocket. You’ll want to cut it a bit larger on each side so you can iron a small fold to avoid fraying ends. You can see on the pocket picture that it doesn’t fit-this picture was taken before I enlisted the help of my mother. I re-cut the fabric for the pocket, using parchment paper to trace the pocket as a pattern. Basically, if my mom didn’t help, I probably wouldn’t have finished these.

image (46)

image (47)

Next, sew it on! I have little to no advice when it comes to working a sewing machine, so you’ll have to find someone else to help you with that if you don’t know how either. Godspeed.

Here’s the finished product! You can see on the opposite pocket that I inserted a few of the studs. I might add more later, but it was kind of hard so I gave up.

image (48)

I chose to roll the ends, but you could either hem them, leave them to fray, or add trim! If you do roll them, I would suggest tacking them so they don’t come unrolled.

image (49)

I’m really pleased with how these turned out, and I’m excited to wear them! I think they would look cute with either a solid tee or a flowy tank.

Hopefully you gained a few tips or a little inspiration for your own denim upgrade!

That’s all for meow!

Follow along on:
Facebook
Twitter
Bloglovin’
Pinterest